
Mechanical keyboard tend to collect dust and grime with use, which is why cleaning them periodically is a crucial part of their maintenance regime. However, finding the right approach to thoroughly clean your device’s challenging design can often be tricky.
- Flip your keyboard upside down.
- Take an image of the keyboard for reference.
- Unplug the keyboard.
- Remove the keycaps to expose the switches.
- Clean the switches with compressed air.
- Vacuum the keyboard.
- Use a dry nylon brush.
- Use a mix of isopropyl alcohol and water.
- Use compressed air again.
- Clean the stabilizers, repeating steps 4-6.
- Replace the keycaps.
- Use a cleaning gel.
- Repeat the process once a month.
Read on to learn more about the ideal cleaning approach for your mechanical keyboard switches. This article will walk you through the necessary steps for maintaining your keyboard, allowing you to remove both debris and germs from your keys.
1. Flip Your Keyboard Upside Down
The first thing you should do when you want to clean your keyboard switches is turn your keyboard upside down and give it a shake. Doing so will remove the largest pieces of debris and save you time in the long run. Tap it gently on the back over a surface that you can wipe clean afterward, and you’ll make some headway in clearing out your switches.
Removing large debris like crumbs and other visible residue will make it easier to remove your keycaps, too, simplifying the process of exposing and cleaning your switches.
2. Take an Image of the Keyboard for Reference
Before you take apart a mechanical keyboard for cleaning, you should take a photo of the keys. This is because you’ll need to remove each of the keys during the cleaning process, and it helps to have a reference to look at once you’re ready to put the keys back in place.
Of course, most keyboards have the same layout, so you can also look for a photo reference online. Taking a photo of your keyboard is simply a way to ensure that you keep your exact layout clear in your mind.
You can also lay out your keys one by one in the same position they’re in on the keyboard as you remove them. This is another way to keep them organized and prevent losses or confusion as you’re cleaning.
3. Unplug the Keyboard
Next, you must unplug the keyboard. Ideally, you’ll shut down the computer and then unplug the keyboard for minimal disruption to your operating system. That way, you’ll be able to put your keyboard back together and plug it back in without your computer registering a difference. Otherwise, you may end up introducing technical difficulties accidentally.
If you’re using a keyboard that’s connected via USB, you’ll be less likely to experience issues during this process, but you’ll still want to shut down the computer and disconnect the keyboard as a safety measure.
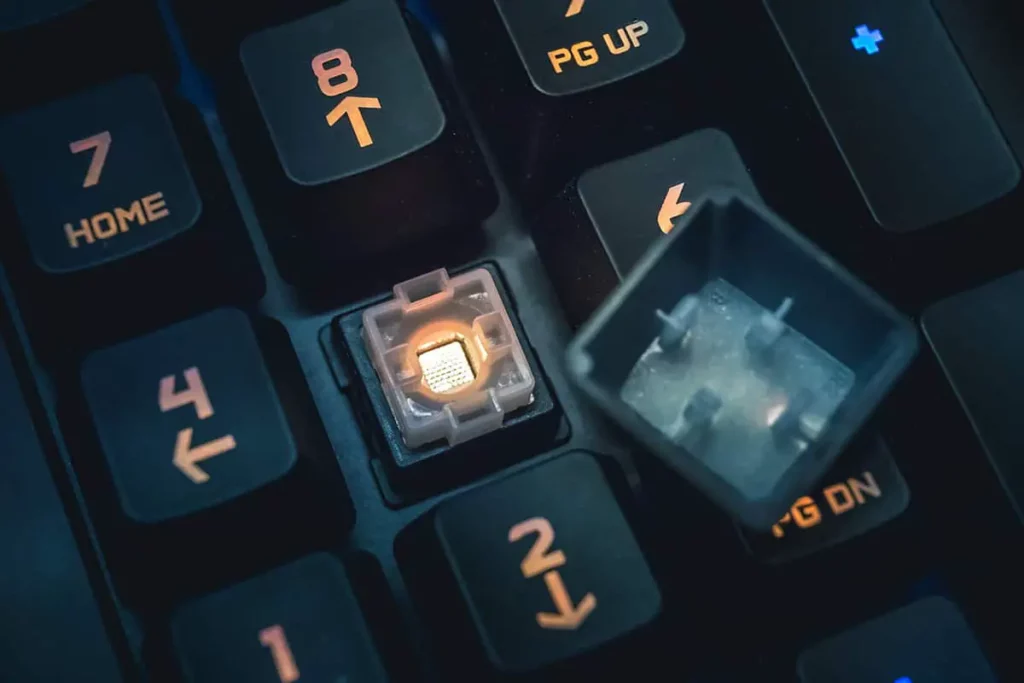
4. Remove the Keycaps to Expose the Switches
The next step is to remove the keycaps to expose the switches underneath. You’ll need to do so carefully so as to not break the keyboard.
Before you start, double-check with your manufacturer that the keyboard is, in fact, a mechanical keyboard and not a pressure pad keyboard, or else you’ll potentially break yours beyond repair by trying to remove the keys. Laptops typically do not have removable keys.
Once you’ve confirmed this, you can use a keycap puller to uproot your keys one by one. This Qisan Keycap Puller from Amazon is a great example of an easy-to-use keycap puller that you can use to safely pull keys from your keyboard and expose the switches underneath.
If you don’t have a keycap puller, you can also use a bent paperclip. Make the paperclip into an L shape, then slide it underneath the key and lift. This is preferable to using your fingernails and pulling, as using your fingers alone can be painful and ineffective.
5. Clean the Switches with Compressed Air
The first step you should take once the switches are exposed is to clear away large debris with a can of compressed air. You can purchase compressed air from Amazon, like this Falcon Dust Duster. This duster comes with a long, thin tube at the point where air exits so that you can maneuver it between switches and into crevices, digging out stuck-on debris.
Although compressed air does not sterilize keyboard switches, it’s an important step toward making them cleaner. The role of compressed air is to remove the large particles from the keyboard to make way for more detailed cleaning.
Just make sure that you take this step over a bathtub, outside, or somewhere else where you don’t mind scattering debris. It can be difficult to control where the compressed air sends the cloud of dust, which is why having a wider target can help.
You should also ensure that you leave some space between the tip of the nozzle and the surface you’re blowing on, as putting the nozzle right on the surface as it’s blowing can cause condensation to form. Condensation can quickly ruin your keyboard, so you should avoid this at all costs.
6. Vacuum the Keyboard
For example, the ColorCoral Vacuum Dust Cleaner from Amazon is a small, handheld device that you can use to detail-clean a keyboard. It has a small brush attachment that sweeps crumbs as it sucks, loosening and capturing debris. It can remove pet hair, dust, and other fine debris, as well as large residues like food crumbs.
It’s also possible to use a vacuum on its own without the need for compressed air, so keep in mind that you may be able to choose between these steps rather than investing in both. Each has its benefits, and they can certainly add to each other, but depending on the state of your keyboard switches, you might only need one or the other.
7. Use a Dry Nylon Brush
A dry nylon brush is an excellent tool for removing stuck-on debris that won’t come off through compressed air or vacuuming.
If you don’t have a nylon brush to use, you can also repurpose an old toothbrush for the job. Alternatively, you can repurpose the brush end of an ice scraper for a car window. Just make sure that whatever you use is clean and dry.
Nylon is a good material to use because it won’t damage the key switches and won’t stick to any gunk between the keys. Other synthetic materials may be good substitutes, but nylon is the best.
8. Use a Mix of Isopropyl Alcohol and Water
Once you’ve removed debris from your keyboard, you’ll want to sanitize the switches to prevent the spread of germs. You can use a solution of 30% isopropyl alcohol, and 70% water to dampen a cotton swab or piece of paper towel, then carefully wipe each switch. You don’t want to drip liquid into the space between the switches, but you do want to thoroughly clean each one.
As you clean, press the switch repeatedly, working the mixture into the switch. You’ll want to remove any gunk keeping the switch from pressing down completely.
Note that solutions with more than 30% alcohol can erode the plastic used to make the keyboard. It’s important to use a more diluted mixture to keep your equipment intact.
Why Sanitizing Your Keyboard Is Important
Sanitizing your keyboard with isopropyl alcohol is perhaps the most important step in the cleaning process, as not only does it remove stickiness but it also kills any potentially harmful bacteria and viruses.
Of course, cleaning your keyboard switches is only one part of keeping your keyboard clean. For a full clean, you’ll also want to sanitize your keycaps, the part of your keyboard that comes into direct contact with your fingers daily.
Now, you can clean each of your keycaps individually, or you can soak them in soapy water once you’ve removed them. You can even multitask, soaking your keycaps as you work your way through the process of cleaning your keyboard switches.
9. Use Compressed Air Again
Once you’ve cleaned the switches with your alcohol solution, it’s time to dry them thoroughly. The best way to do so is to use the same compressed air you used to clear debris. The compressed air will accelerate the drying process and ensure that no moisture collects in the spaces between the key switches.
You can also use a dry cloth to wipe the switches or the spaces between them if there seems to be some excessive moisture or to accelerate the drying process even further.
10. Clean the Stabilizers, repeating steps 4-6
Next, you’ll need to clean the stabilizers that hold the switches in place. You can follow the same steps you used to clean the switches to clean the stabilizers, repeating steps 4-6.
The stabilizers are prone to collecting dust and grime, so be sure not to skip this step. Having dirty stabilizers can make your keys stick as much as having dirty switches can.
11. Replace the Keycaps
Once all the pieces of your keyboard are cleaned and dried out, it’s time to put your keycaps back in place. If you took a reference photo when you first started your project and kept your keycaps organized throughout, you’ll find that the project will be much simpler and easier than it’d be without that level of forethought.
Inserting the keycaps should be as simple as popping them back into place with your fingers. Unlike removing the keycaps, inserting them shouldn’t require any special tools.
12. Use a Cleaning Gel
You can use a cleaning gel like the Universal Dust Cleaner from Amazon as a final step. This putty-like cleaner sinks into crevices and sticks to dust. Then, you can pull it out and uproot any dust or debris left sitting in the small places between the keys. As a bonus, this gel has a fresh lemon scent that will leave your keyboard smelling clean and new.
13. Repeat the Process Once a Month
Finally, make sure that you repeat this deep cleaning process once every month. Even if you don’t notice stickiness or grime developing, this will ensure that your keyboard is kept functional and clean, optimizing its performance and longevity.
Additionally, you should do a surface clean of the keyboard once per week, wiping down the keys with a disinfectant.
You can also do partial cleaning of the keyboard as needed, removing and replacing keycaps if particular switches are sticky and need attention.
Conclusion
If you want to clean your mechanical keyboard switches properly, you’ll need to remove the keycaps and then clean the switches with compressed air and isopropyl alcohol. This combination will remove both debris and germs from your keyboard, leaving you with a sanitary, functional keyboard free from gunk.