

The second new location in Escape From Tarkov is the Customs map, where you can finish the Chemical Part 1 quest. The quest will only be available to you if you are level 10 or higher. Alexander Fyodorovich Kiselyov, a.k.a. “Skier,” assigns you this quest. This is all the information required to finish Escape from Tarkov’s Chemical Part 1.
Escape From Tarkov Chemical Part 1 Quest Details
The number of pointless side missions that the Escape From Tarkov Chemical Part 1 quest generates is the main reason it can be a little confusing.
Finding information about the Deputy Chief’s previous life on the Escape From Tarkov Customs map and giving it to Skier is the primary goal of the Escape From Tarkov Chemical Part 1 quest.
As is typical with quest information, the other subtasks’ goal is to provide you with the location of this information. However, since you are following our guide and we are providing you with the precise location of the information, none of these will be necessary for you to complete.
But even after completing Chemical Part 1, it’s still worthwhile to accept Prapor’s Polikhim Hobo quest, as it offers a decent amount of experience points and Prapor’s reputation.
After finishing the quest, you will be rewarded with the following:
15 000 Roubles
4,800 points
One helmet from the MSA ACH TC-2002 MICH Series
A 0.04 increase in your Skier rep
Steps in completing Chemical Part 1 Quest
The skier will give you instructions on how to complete the quest, which is necessary in order to obtain a Kappa container. What you should do is as follows:
Find out what the Deputy Chief’s previous life on customs was like.
(Optional) Find the former Deputy Chief of Security’s’ sleeping quarters.
Turn over the data to Skier.
Acquire objects that will aid in the inquiry.
Give the things to Skier.
To finish the assignment, you’ll need the Dorm 220 key. The key appears inside filing cabinets, in the pockets and bags of Scavs, and on jackets. This key is also available at the flea market. By going to the train container next to the ZB-1012 extraction point on the Customs map, you can obtain the key and the item required to finish the quest. On either side of the train container, there are towers with the year 1986 written on them.
How To Complete The Escape From Tarkov Chemical Part 1 Quest
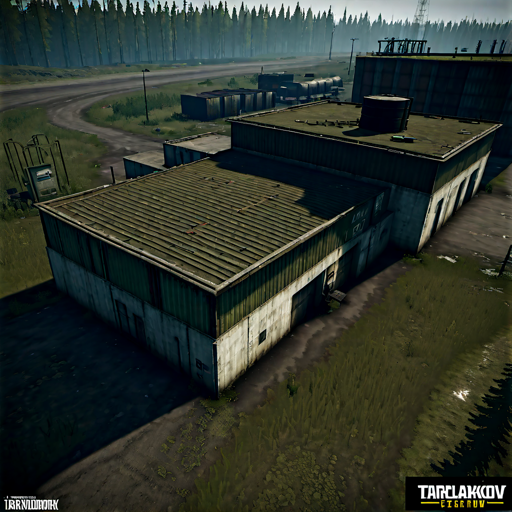
You must go to the solitary train carriage between the ZB-1012 and ZB-1011 extracts on the boiler side of Customs in order to finish the Escape From Tarkov Chemical Part 1 quest.
Once inside, look for the side that has the sports bag. The information should be in a crack in the bottom left corner. You will need to lie down in order to reach it, and it will be pretty hard to see, but if you follow these instructions, you can pick it up.
Fortunately, that is all you need to gather for the quest; all you now need to do is safely exit the raid. You’ll be lucky if you spawned on the Crossroads side of the map, as you can just go into the ZB-1011 extract; if not, you’ll have to endure the difficult trek across.
That concludes how to finish the first part of the Escape From Tarkov Chemical Quest, and it also tells you where the information documents are. See our Escape From Tarkov Disease History quest guide if you need assistance with a Therapist quest that you might run into soon.
What are the best early wipe weapon builds in EFT?
The UMP.45, VPO-209, and VPO-215 are the three weapons we have chosen for our initial wipe builds in Escape from Tarkov, covering all the bases with an SMG, assault rifle, and sniper.
These will be ready to use right away, though they will require some searching for some barter items. You can obtain all of the weapons and parts here without having to finish any quests or level up any of your Traders.
UMP .45 build
By obtaining and equipping the weapon with the following components, you can make this early wipe UMP.45 build:
| Part | Price (Trader) |
| NcSTAR Tactical blue laser LAM-module | 5,658₽ (Skier LL1) |
| KAC vertical foregrip | $27 (Peacekeeper LL1) |
As the components can be easily assembled by simply slapping them onto the weapon, this build is incredibly straightforward. The UMP.45 is still incredibly powerful without the use of either of these components; the laser merely improves hip-fire accuracy, and the foregrip slightly lessens the already-minimal recoil.
Obtaining the UMP.45 itself is a little more difficult because you can’t purchase it directly and must instead choose between the following two barters:
| Barter Items | Trader |
|
Peacekeeper LL1 |
|
Mechanic LL1 |
If you’re playing your Scav on maps like Reserve or Interchange, though, you’ll find that both of these barters are unlocked right away and that finding the items isn’t too difficult.
Lastly, confirm that the ammunition you’re using is the.45 ACP Match FMJ, which you can buy from Peacekeeper LL1 for one dollar a round. With a powerful 72 damage and 25 penetration, this round is very effective against Class 3 armor and can also be used effectively for leg meta.
I’ve been using this early wipe build exclusively for a few years now. The combination of Match FMJ’s immense damage and the UMP’s minimal recoil has seen me through numerous raids and assisted me in taking out numerous PMCs.
Due to the popularity of this strategy, I have found that it can be difficult to obtain the UMP in the early stages of each wipe; however, by being aware of the Trader reset times and using a little bit of luck, you can succeed.
VPO-209 build
The VPO-209 is our next option, which will provide you with more versatility in medium-range combat. The following parts are all that you will need to purchase for the build:
| Part | Price (Trader) |
| AK AKademia Bastion dust cover | 6,325₽ (Skier LL1) |
| AK 7.62×39 Magpul PMAG 20 GEN 20-round magazine | 2,746₽ (Skier LL1) |
| Walther MRS reflex sight | 13,800₽ (Skier LL1) |
| WASR-10/63 CAF wooden foregrip | 3,968₽ (Skier LL1) |
Remember that in order to attach the Bastion and then the MRS reflex, you will need to remove the Molot AKM-type dust cover and the VPO-208 rear sight, so keep that in mind if they stop working.
If you want to save a little money, you can also forgo the MRS reflex and the Bastion in favor of iron sights. However, keep in mind that using iron sights will make it more difficult to aim the gun accurately.
The VPO-209 is available from Skier LL1 for 28,378₽, so the total cost of this build is 55,217₽, though the reflex sight accounts for a significant portion of that amount.
The VPO-209 may not have the ostentatious fully-automatic features you would expect from an assault rifle, but since there are virtually no options available when the wipe is first initiated, semi-auto firing is the best option.
Since Prapor LL1 no longer offers the 7.62×39 PS, the.366 EKO is unquestionably the best option since it allows you to be precise and lethal at medium ranges.
Because of their longer sightlines, this build is great on beginner maps like Customs, Woods, and even Shoreline as you progress. I love using it when I’m going for a more methodical approach to my raids.
VPO-215 build
Lastly, if you prefer sniping, take a look at all the components required for the perfect VPO-215 build down below:
| Part | Price (Trader) |
| Leapers UTG 25mm ring scope mount | 1,733₽ (Jaeger LL1) |
| VOMZ Pilad 4×32 24.5mm riflescope | 15,192₽ (Jaeger LL1) |
Although the Mosin is much more powerful than the VPO-215 and can be obtained from Prapor LL1, it is only available as the infantry version, which means that a scope cannot be installed.
That’s where the VPO comes in, providing you with an affordable, excellent stealthy sniper build.
In contrast to the other builds we’ve listed, obtaining this weapon and its components will require you to finish Introduction and unlock Jaeger. But since it’s so early on, it’s not really that big of an issue.
To test your aim and go into your next raid, simply attach the Leapers scope mount to the gun and then the VOMZ Pilad scope.
You can go directly to the.366 TKM EKO rounds for this gun, which cost a pitiful 69₽ apiece, since you’ll already be at Jaeger. When you add this to the 18,585₽ that you must send to Jaeger for the gun itself, you can purchase a complete sniping kit for 35,510₽, including ammunition.
To be honest, I think the VPO-215 is not my favorite sniper to use in Escape from Tarkov because of its poor MOA and insufficient ammo to kill most targets with a single shot. But it’s fantastic for the early game, so make the most of it while you can.
These are the three that, in our opinion, are the most effective if you want to survive your raids without getting damaged. Of course, there are many more weapons available to you in the early stages of Escape from Tarkov.
That covers all the information you require regarding the top early wipe weapon builds in Escape from Tarkov.
Best Escape from Tarkov key binds for healing, reloading and more
The sheer quantity of actions available in Escape from Tarkov makes it one of the most intense first-person shooters available on the market at the moment. You can accomplish a great deal with the correct keybinds, and you might be surprised by how many of them are already in the game but are easy to overlook.
The best custom key binds in Escape from Tarkov
You’ll need to use every custom key bind listed below to help you survive raids and win more gunfights in Escape from Tarkov. These keybinds significantly speed up important actions like healing, reloading, and clearing weapon jams, allowing you to get back to the action faster.
| Key bind name | Custom bind | Action |
| Removing quick reload | Change ‘Reload’ to ‘Double Press’, then back to ‘Press’ | eliminates the double press lag to guarantee a faster reload |
| Removing sidearm quick swap | Change ‘Sidearm’ to ‘Double Press’, then back to ‘Press’ | eliminates the wait when transferring to your backup |
| Dual med bind | Bind ‘Slot 4’ to 4 as ‘Release’, then bind ‘Slot 5’ to 4 as ‘Press’ | allows you to take two medications at once, such as Salewa on “Release” and CALOK-B on “Press.” |
| Always hold breath | Bind ‘Hold Breath’ to RMB as ‘Release’, then bind ‘Aim’ to RMB as ‘Press’ | makes sure that as soon as you scope in, you’re holding your breath. |
| Easy magnification switch | Bind ‘Change scope magnification’ to Mouse 4 or Mouse 5 | makes sure that as soon as you scope in, you’re holding your breath. |
| Easy tactical device switch | Bind ‘Toggle tactical device’ to Mouse 4 or Mouse 5 | Allows you to quickly press a button to turn on and off lasers or flashlights |
| Quick exit check | Unbind ‘Check time’ and then set ‘Check time and exits’ to single instead of double | allows you to quickly check the time and the exit points by pressing a single button. |
| Gun malfunction combo | Bind ‘Check chamber/fix malfunction’ to L on press, then ‘Inspect current weapon’ L on release | allows you to double-press L to clear any gun jam. |
While learning these key binds and incorporating them into your regular play may take some time, they are truly game-changing in almost every raid you’ll encounter. The gun malfunction combo below is by far the most crucial of the lot; I can’t even begin to count how many times it has saved my life while playing.
The ability to eliminate a weapon jam and resume firing by double-tapping the L key is incredibly helpful, as I’ve always found the default procedure to be far too complicated.
When playing, the dual med bind comes in very handy as it saves you the trouble of determining whether you have a heavy bleed. In the event that you do have one, it will take precedence over restoring your HP because it is a far more urgent matter. It’s neat that it will bypass the initial bind and go directly to healing your parts if there isn’t a significant bleeding.
Best pre-existing key binds In Chemical Part 1
You may have overlooked some of the many useful key binds that are pre-established in Escape from Tarkov, but you can learn a few new techniques by looking at the table below:
| Name | Key bind | Take Action |
| Quick transfer | CTRL + LMB | Move things quickly to your rig or backpack. |
| Quick equip | ALT + LMB | Equips objects to your PMC quickly |
| Quick walk | Caps Lock | Fast-moving to the slowest possible speed of movement |
| Crouch adjust | C + Scroll up/down | Modify the PMC’s crouch height. |
| Quick Stash scroll | Page Up/Page Down | Hops rapidly to the top or bottom of your stash. |
| Free Look | Middle mouse button + mouse movement | Look without regard to the direction in which you are moving. |
| Smooth lean | ALT + Q/E | Lean slowly in either direction to make more precise adjustments. |
| Smooth step | ALT + A/D | Move slowly to the left or right. |
| Blind fire | ALT + W/S | To shoot around cover, raise your pistol above or to the right. |
| Magazine select | R + Scroll up/down | For greater accuracy, select the previous or next magazine in your rig. |
| Quick melee hit | Double tap V | Take advantage of your melee weapon without having to draw it. |
| Backpack drop | Double tap Z | Drop your backpack quickly to gain more movement during battles. |
| Change tactical device | CTRL + T | Change the settings on your tactical device. |
| Switch scopes | CTRL + RMB | Changing between a weapon’s various scopes |
| Switch magnification/reticule | ALT + RMB | Adjust the scope’s magnification level. |
| Check ammo | ALT + T | Verify the type and quantity of ammunition in the loaded magazine. |
| Identify | Middle mouse button | Identify objects quickly |
| Change fire mode | B | Switch between fully automatic, burst, and single-fire fire modes. |
| Check fire mode | ALT + B | Verify your fire mode right now. |
| Quick full auto | Double tap B | Turn on fully automatic firing mode as soon as possible. |
| Scope zeroing | Page Up/Page Down | When zoomed in, set the scope zero level. |
| Split item stack | CTRL + LMB | Divide the items in a stack; this is helpful for ammunition. |
| Discard | Delete key | Throw away items as soon as possible. |
| Rotate | R | Turn over things in your bags or stash. |
Although you probably already know a few of these, if Tarkov is new to you, it’s imperative that you commit every name to memory. They’ll be of great assistance with anything from setting up your stash to helping you with everything else.
One crucial piece of in-game technology that you can use to improve your movement in gunfights is the backpack drop. In the event that you find yourself in a fight while carrying a lot of loot, remember to double-press Z to release your bag and regain your freedom of weightless movement.
Escape From Chemical Part 1 Tarkov player count in November 2023
The number of players in Escape From Tarkov increases with every wipe. Since Escape From Tarkov is a rather intense game, its player base must be quite devoted.
There are several ways to find the number of players, including using streaming services like Twitch to find out how many people are interested in the game. This is all the information you require regarding the number of players in Escape From Tarkov. See our Escape From Tarkov best settings guide for more details.
What are the best guns in Escape from Tarkov in patch 13.5.1?
See all of the top weapons and metaweapons in Escape from Tarkov that you should be utilizing in patch 13.5.1 by looking at the table below:
| Weapon Type | Best Guns |
| Assault Rifles |
|
| Designated Marksman Rifles |
|
| Pistols |
|
| Shotguns |
|
| Sniper Rifles |
|
| Submachine Guns |
|
As you can see, Escape from Tarkov offers a wide range of excellent weapons suitable for various playstyles. If you choose any of the aforementioned options for your raids, you will still be bringing in one of the best weapons in the game, even though some of them are better than others.
But make sure to keep reading for more information if you’d like to learn more about some of the best choices.
Best Pistols in Escape from Chemical Part 1 Tarkov
FN Five-seveN MK2 5.7×28
How to obtain: LL3 Peacekeeper
Characteristics:
potent ammunition
pristine iron sights
rapid rate of single-fire
Any of the pistols can be used to deal with almost anybody without a face shield, but each has certain disadvantages that vary in terms of weapon damage, penetration, and reload time.
Nonetheless, the FN Five-seveN is a clear favorite among the handguns, possessing a rapid fire rate, a speedy reload, and a special kind of ammunition that can truly surprise adversaries.
Although it can easily hold its own against class four and five armor, the weapon’s best ammunition is effective up to class six armor as well. In addition, if you need a sidearm in Escape from Tarkov, hitting those headshots will ensure a kill even against visors, making this a great option and one of the best weapons.
Best Shotguns in Escape from Chemical Part 1 Tarkov
TOZ KS-23M 23x75mm
How to obtain: Prapor following the conclusion of “School Guard – Gendarmerie.”
Important characteristics:
strong standard rounds
a distinct flashbang round
incredibly enjoyable to use
The KS-23M shotgun is still one of Escape from Tarkov’s best weapons, even though it isn’t quite as lethal as it was when it was first introduced to the game.
The Star Flashbang Slug, which fires a flashbang rather than a regular shot at opponents, is the main feature that makes the pump action shotgun so appealing.
When you pair this with the Barricade Slug or Shrapnel 10 buckshot, your opponent’s PMCs will be unable to see what hit them—quite literally, in this case. This is one of the greatest (and most annoying) weapons in EFT when used properly, but it’s unfortunately difficult to obtain for good reason.