
Minecraft may be an old game with pixelated graphics, but thanks to the unlimited potential Minecraft has in modding, the community has given us Shaders, graphic enhancing Mods that adds improved lighting and shadow effects, making visuals realistically pleasant in real time shading and dynamic lighting. Here’s the Best Minecraft Shaders in 2021 listed below.
Vanilla Plus Shader
Vanilla Plus is a new Minecraft Shader that wants to stay true to the Vanilla Minecraft experience. The shading is not overly complex, making the visuals look simple in the game while adding that modern feeling to the gameplay aesthetics. It’s also great for low-end computer systems.
Adding the usual Dynamic lighting, and Shadows, it doesn’t overly saturate the visuals with the complex shading effects, volumetric fogs and all, which makes it really have that simplistic visuals as shown in the images.
BSL Shaders
Just like Vanilla Plus, although older, BSL Shaders is great and known for being a starting Shader, when you’re new to shaders, or don’t want anything complex, BSL shaders is a likely choice to enter the world of Minecraft Shaders adding real time-shadows, volumetric light, bloom and more.
BSL keeps the Vanilla Minecraft experience intact while improving overall shading in the game to gain a modern shader look and you can see this in the images provided as the only difference would be the lighting and even that, it has the Vanilla feel but just with a bit more modern shading applied to it.
Oceano Shaders
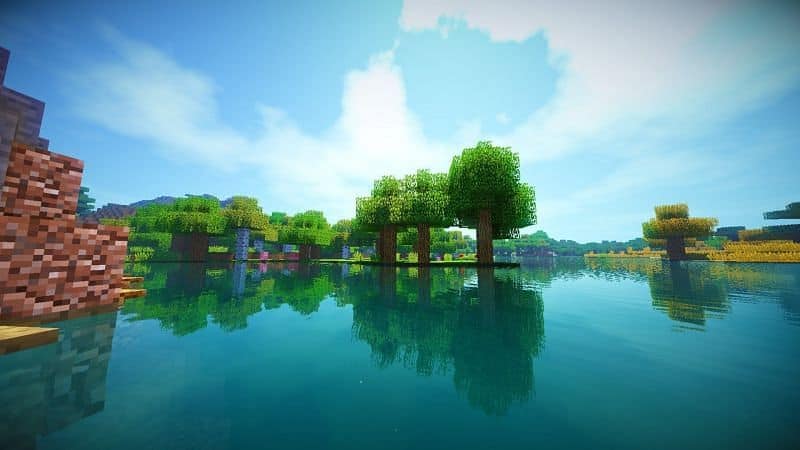
Oceano Shaders is a fairly recent shader from 2019, and it has been known to be used for people who love a vibrant colored world. Oceano’s vibrant colors and shading adds a more tropical feel to the game, with clear water, bright green trees and blue skies, just like how a tropical island would be.
Although, the Shaders are a resource-heavy shader pack requiring a good graphics card, I can see why people enjoy this Shader visually, because tropical experience and Minecraft just goes together.
Continuum 2.0
Continuum is another Minecraft Shader pack that caters to the High-end computer systems, just like SEUS, and if you have a side-by-side comparison, they do have its similarities, just a bit of color shading difference.
Continuum is actually based on the Original SEUS shaders, and that’s probably why it has its similarities, the shader modifies a lot of in-game rendering, Volumetric lighting, realistic shadows, and a dynamic weather system, which they do a great Job adding that realistic effect.
Continuum 2.1
The developers are currently working on a new version of the shader which is 2.1 which needs payment, and still currently in Early Access. They are said to be aiming for better performance, player immersion, and more AAA graphical effects that you could want into Minecraft.
More features include, Volumetric Lighting, SSR, 3D Volumetric Clouds, PBR and more. With more customizable options from color changing and your own configurable camera system. You could go down to their site, and check out the Early access of 2.1 if you’re interested to buy.
Kuda Shaders
Kuda shaders has been a popular Minecraft Shader in the community for a long time, although better Shaders have appeared, KUDA is still widely used just because it still looks stunning, the volumetric fog is gorgeous, and the best thing is, it’s bug and glitch free.
KUDA has been out since 2017 which the developers have always been hard at work to fix every possible bug in the shader, so it’s unlikely to experience bad lighting, and shadow detail. The Shaders have a wide range of customizable options to change lighting and other graphical effects to improve visual aesthetics.
Chocapic13
Chocapic13 another known Minecraft Shader compared to Sildurs, it’s widely attracted by players due to its “uniqueness”, and personally a shader I enjoyed using. I find the overall visual aesthetic that the shader adds is beautiful, the night times, sunsets, snow storms and more is wonderful in this shader.
I think you should see and try it for yourself, I find it especially unique in that way, as other shaders I do try always have a similarity in some form but this, not really. The developers also have multiple variants, from “Lite” to “Extreme” for optimization.
SEUS
SEUS is a popular Minecraft Shader among the RTX or High-end graphic card users, the shader does have a normal version called “Renewed” for people with weaker PCs, although it’s still demanding on the graphics card.
Trying out “SEUS PTGI” is a resource demanding shader that makes Minecraft look amazingly realistic as possible that you can get out of a blocky game. Enhancing textures, ray-tracing and other technical shading effects. It’s a gorgeous shader for a high-end PC, it’s a shader that can compete with Minecraft’s Vanilla RTX mode.
Sildurs Shaders
Sildurs is a Minecraft Shader that attracts a lot of people due to its vibrant shading, adding colorful lighting enhancements, and changing minor appearances in the game that makes the shaders very noticeable due to how it effects the vibrant colors and small details from the Vanilla Minecraft.
The shading is also an iconic feature as Sildurs try it’s best to represent how the light would work based on real life, keeping edgy corners smooth, and shadows soft around the blocks. The shader pack also does minor changes to the textures and animations, which goes well with texture packs.
The developers have included multiple versions from a “Lite” version to an “Extreme” version, and depending on how good your PC is to run shaders, you can pick the appropriate optimized version, so your FPS won’t suffer.
How to Install Minecraft Shaders
We can install Minecraft shaders by using the Optifine Mod, this gives us a Shader menu in the options for us to drag and drop our downloaded Shader Packs into the games folder.
1. Install Optifine
2. Find a newly added Menu button called “Shader Packs”
3. Drag and drop, or open the location of the Shaders Folder and transfer the downloaded Shader files into the Shader folder and you’re good to go.